Not sure about How To Install Elementor Pro? Do you need Elementor for your WooCommerce storage in 2025? Fortunately, Elementor has now launched Cloud Website hosting that you can use to have your hosting along with the Pro plugin activation.
Elementor Cloud is the best solution to launch your eCommerce store right away. You don’t need to purchase Elementor Pro with Elementor Cloud separately. You will get all the Elementor Pro plugin features included with Elementor Cloud Website hosting. Elementor Cloud takes a few minutes to set up and saves your time in building an attractive website.
Let’s see How To Install Elementor Pro.
How to Install Elementor Pro? (Step By Step Guide)
Follow the steps given below to set up Elementor Cloud, and at the end of this process, you will be able to activate the Elementor Pro plugin on your dashboard.
1. Create an Account
In order to start a new Elementor Cloud website, you need to create an Elementor account. Visit the official website of Elementor and click on Get Started to create a new account for free.
You need to enter your email and a strong password to sign up for a new account. After that, you can choose your business type and your requirements to finish creating the website.
If you already have an existing account, you can skip this step.
2. Purchase Elementor Hosting Plan
After creating the account, you will need to purchase the Elementor Cloud Hosting subscription to move further.
Click on Buy Now under the Elementor Hosting plan and fill in your billing details to complete the payment.

If you already have an Elementor Pro subscription, you can upgrade your account to Elementor Cloud to make your workflow hassle-free.
3. Set your Website’s Name
Once your payment is completed, you need to give your website a name. Assign your website’s name according to your niche and click on Next.
4. Select a Subdomain
On the next page, the setup wizard will suggest an available domain name according to the website name you have set. If you want, you can change it and make it short & memorable. You need to check domain availability for your manual domain. If it shows “domain is available,” you can move further by clicking Next.
5. Choose Website Type
Next, select the type of your website. You will see four options:
- Portfolio
- Online Store
- Blog
- Business / Corporate Website
Then click on Next.
6. Choose a Website Kit
In this section, you can choose a relevant website kit to expertly design and customize your website. You can find Basic, Moderate, and Advanced kits for customization. You can click on a kit to know what’s inside it. Additionally, you click on Preview to see how your website will look after using the kit.

If you want to do the editing process later, you can click on “I’d rather start from scratch.”
7. Activate Elementor Pro Plugin
After completing the setup process of Elementor Cloud, the system will take a few seconds, and then it will automatically activate the Elementor Pro plugin on your dashboard. You will also receive all the information about your account via email after the installation of Elementor Pro.
In case you don’t want to go with Elementor Cloud, you can follow these steps to install the Elementor Pro plugin in your WordPress.
Step #1. Purchase the Elementor Pro plugin. After the successful payment, you will receive login credentials for your account in your email.
Step #2. Go to my.elementor.com to navigate the Elementor dashboard. Sign in to your account using the login credentials you received in your email.
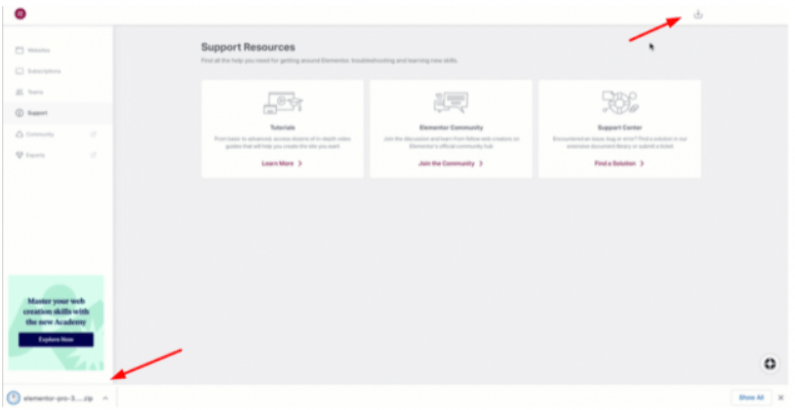
Step #3. On the dashboard, click on “My Account” and then click on “Download Plugin” to download the zip file of the Elementor Pro plugin.
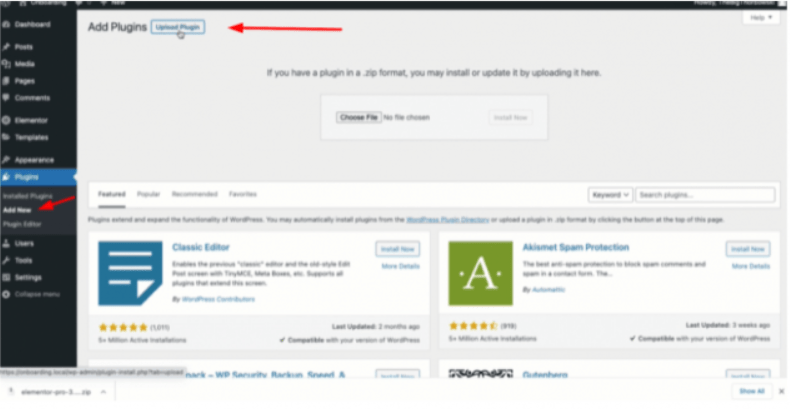
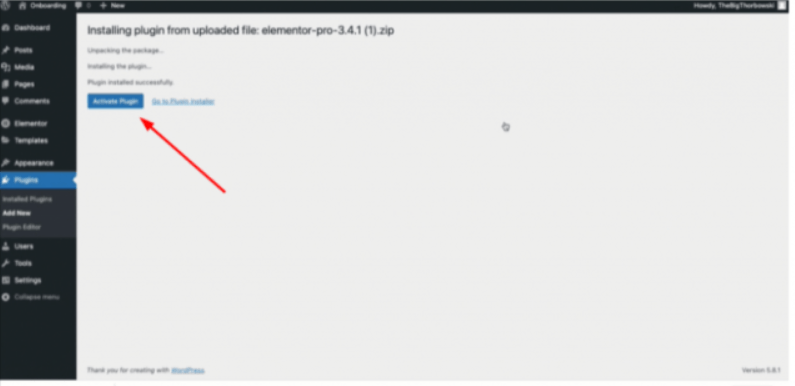
Step #4. Now log in to your WordPress website and go to Plugins >> Add New. In the next section, click on Choose File and select the zip file you have downloaded. Install the plugin and click on Activate.
Step #5. Once the installation is finished, the system will ask you to activate your Elementor Pro license key. Here, select your account and tap on “Connect & Activate” to activate the plugin.
Elementor Pro Features
Let’s take a quick look at the Elementor Pro Features
| Sr. No. | Elementor Pro Features |
|---|---|
| 1. | Theme Builder |
| 2. | Form Builder |
| 3. | WooCommerce Builder |
| 4. | Pop Up Builder |
| 5. | Custom CSS |
| 6. | Widgets |
| 7. | Third – Party Integration |
| 8. | Custom Fonts |
| 9. | Dynamic Content |
| 10. | Motion Effects |
1. Theme Builder
Theme Builder can be said to be a part of the page builder plugin. Here you can change or customise any part you want like archive pages, footer, header ,and much more. With the help of Theme Builder, you can add, edit or delete parts to your website. The backend language used to write down WordPress is PHP. Template files make up a WordPress Theme. Each template file regulates how a theme section is laid out. For example, header.php will be controlling the header part and similarly the footer.php will be controlling the footer part of the theme. This helps the user to create the layout the way he/she visualises it. Here you can make as many changes as you wish.
2. Form Builder
Form Widget is one of the most useful and important feature of Elementor. If you are creating a website for expanding your business, your main goal is sales or people who are interested in your services. Elementor helps you to create a wide range of form types to gather the information. Name, Number, Phone No., Email ID, Date, Time and much more are the filed types which are supported by Form Widget. Integrate reCAPTCHA to your form to avoid spammers.
3. WooCommerce Builder
If you are looking to create an Ecommerce store with Elementor, then you can integrate WooCommerce to your WordPress Website and later customise the part of template whichever you want and take the website to a new level. The WooCommerce components for which you can design your own themes include:
| Sr. No. | WooCommerce Components |
|---|---|
| 1. | Single Product Page |
| 2. | Shop Page |
| 3. | Cart Page |
| 4 | My Account Page |
4. Pop Up Builder
For this feature you will have to upgrade to the Elementor Pro. Without any coding part, you will be able to create amazing pop ups for your website. There are more than 100 Popup templates which includes notification bars, subscription pop ups and much more.
5. Custom CSS
You can create amazing and stunning websites on Elementor without much coding. But not everything you want might be there on Elementor. Elementor allows you to add custom CSS in order for you to achieve certain styles. You can add it to any section, column or widget.
6. Widgets
Elementor has given out various free widgets for user to make there website more appealing. If you are not satisfied by the Elementor free version widgets, Elementor Pro comes up with more advance widgets. Some of the widgets are, Posts, slides, price table, template, site logo and much more.
7. Third – Party Integration
Third-Party Integration is the attachment of one application’s API (application programming interface) to another. You can create a wide range of form and later integrate it with another application which will integrate the product to carry out the same tasks as the integrated program.
8. Custom Fonts
The free version of Elementor allows you to have a wide range of font styles. You also can install the font style of your choice. If you use Adobe Fonts you can integrate it with Elementor too.
9. Dynamic Content
Elementor doesn’t only help you create a static website but also a dynamic website. With the help of dynamic content support you can create a website such as a news portal, a blog, listing website, and different types of dynamic website. By using these widgets like Post Title, Site Title, Logo and much more you will be able to add dynamic content to a theme builder.
10. Motion Effects
What motion effects does exactly do? It allows you to give a motion effect to a particular element, be it an image or text. With the help of this you can add animation effect to make it look more appealing. For this, you wont require to do the coding stuff. It comes with Elementor Pro, this falls under two categories , i.e. Mouse effect and the scrolling effect.
Elementor Pro Pricing Plans
Elementor has two types of pricing options: Plugin Pricing and Elementor Cloud Website Pricing. Here we have explained both of them in brief:
Elementor Plugin Pricing
It offers three different plans and they are given below:

Elementor Pro Essential Plan:
$59/year for 1 Pro Website Activation
Elementor Pro Expert Plan:
$199/year for 25 Pro Website Activations
Elementor Pro Agency Plan:
$399/year for 1000 Pro Website Activations
In all these plans, you will get complete access to the features of Elementor Pro.
Related Read:
Conclusion: How To Install Elementor Pro (2025)
So this is the process you can follow to install the Elementor Pro plugin on WordPress. But if you want to activate the Elementor Pro plugin without any hassle, you can definitely try Elementor Cloud Hosting. While choosing a subscription, you will see two options: Elementor Pro and Elementor Cloud. Elementor Pro costs $49/year, while Elementor Cloud costs you $99/year. But if you compare both plans, Elementor Cloud offers you two times more features than Elementor Pro.
However, if you are not happy with the Elementor Cloud services, they offer a 30-day money-back guarantee. You can claim your money back and switch your account to Elementor Pro.

